How to Create and Submit XML Sitemaps
You know that sites that submit proper XML sitemaps are crawled 50% faster than others who don’t, right? I have assisted countless websites in improving their indexing through proper sitemap implementation. An XML sitemap creation is much like a roadmap for search engines – it makes them discover and interpret your content much better. Let’s now delve into how to create and submit your sitemap the right way.
What is an XML Sitemap?
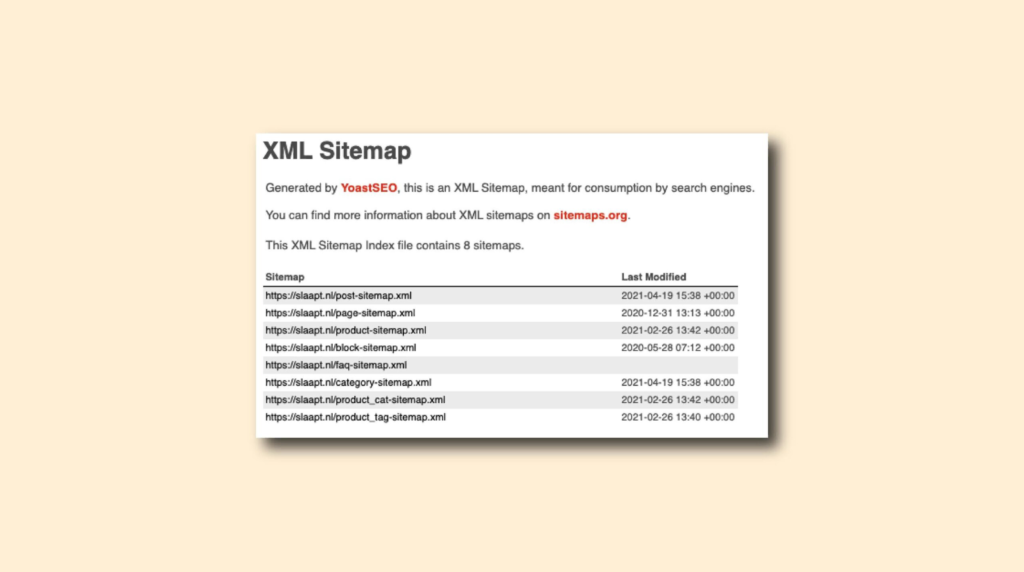
The XML sitemap serves as a detailed map, guiding the search engine crawlers to the significant pages of a website. It actually informs the search engine what it should crawl and makes the process of indexing smoother and faster. Basically, it is not just a link listing but a vehicle that feeds essential information into every URL, like when it was last modified, how often it changes, and its priority comparative to other pages on your site.
There are different sitemap types and each has a specific purpose. The standard XML sitemap ensures to report the major URLs on your website, whereas an image sitemap makes image indexing swift and effective for the search engines. In the case of the presence of videos in your site, a video sitemap ensures proper indexing and ranking of videos by the search engines. A news sitemap is mainly used by media sites as this will help in faster discovery of new news content by the search engines. All of these sitemap types have a specific structure and need some elements that are allowed to make it happen. Allowed elements include location, which is the URL, last modified, change frequency, and priority.
However, there are some technical limitations. For example, a single sitemap file can hold up to 50,000 URLs; apart from that, its size cannot be more than 50MB unless it is compressed. That means on larger sites, one may want to break the sitemap into smaller pieces or use a sitemap index to keep them organized. The benefits of XML sitemaps are pretty straightforward-they are better for SEO because it becomes easy for search engines to find your content sooner, meaning quicker indexing and hopefully better rankings.
XML Sitemap Creation
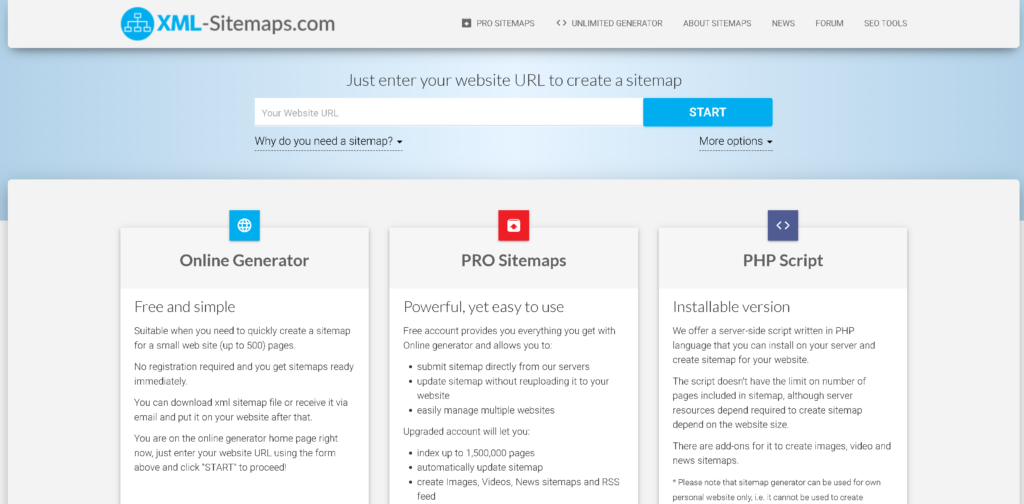
There are a couple of different ways an XML sitemap could be created. If comfortable with coding, one can simply create their sitemap manually to the standards for XML format. Most people, though, would want to use sitemap generator tools because the process gets really easy through them. You can go for XML-Sitemaps.com or Screaming Frog; with both of them, one or two clicks, and your sitemap to your website is already generated.
With the use of a CMS, such as WordPress, there are plugins that can automatically create and update sitemaps themselves. In such cases, you may install Yoast SEO or All in One SEO Pack and let them build your sitemap dynamically according to the structure of your website; you will not need to be concerned with investing much time in doing it. Such plugins ensure that every newly created page or post directly goes into your sitemap without any intervention on your part.
Regardless of how you create your sitemap, there are some formatting requirements you’ll want to adhere to. For example, each URL should be enclosed in <URL> tags, and every entry should include <loc>, <lastmod>, <changefreq>, and <priority> tags for the critical information on the pages. You should test your sitemap and validate it before it goes live to make sure there are no errors in your submission. This is able to be done through Google Search Console or even third-party XML validators.
Optimizing Sitemap Structure
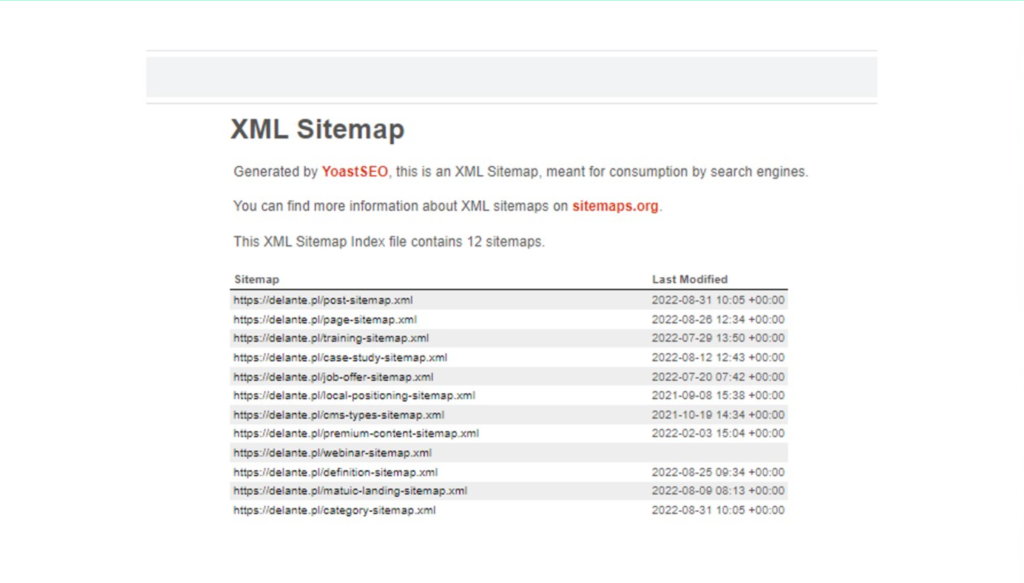
Of course, the better the structure of this sitemap, the more effective it will be. You would achieve this by making the most crucial URLs, such as your homepage, product pages, or even blog posts, higher in priority. This tells the search engines that these pages are of higher value and deserve crawling on a higher frequency.
Another important factor is the update frequency. Use the <changefreq> tag to indicate how often the page is updated. For example, blog pages, which usually are updated very often, can have a higher frequency than static pages, such as your About or Contact page. On big websites, the management of the sitemap structure becomes even more important. Break down your sitemap into sections that are more manageable in size; doing this makes sure the search engine gives all URLs due attention.
Make your sitemaps multilingual if your website covers more than one language. That can mean a different sitemap for each language, or using hreflang tags in your sitemap to note language and geographical targeting for certain pages.
Another thing: you will want to make sure that some URLs are excluded that don’t need crawling-like admin pages or duplicate content. This keeps search engines from wasting crawl budget on unnecessary pages.
How to Submit Your Sitemap
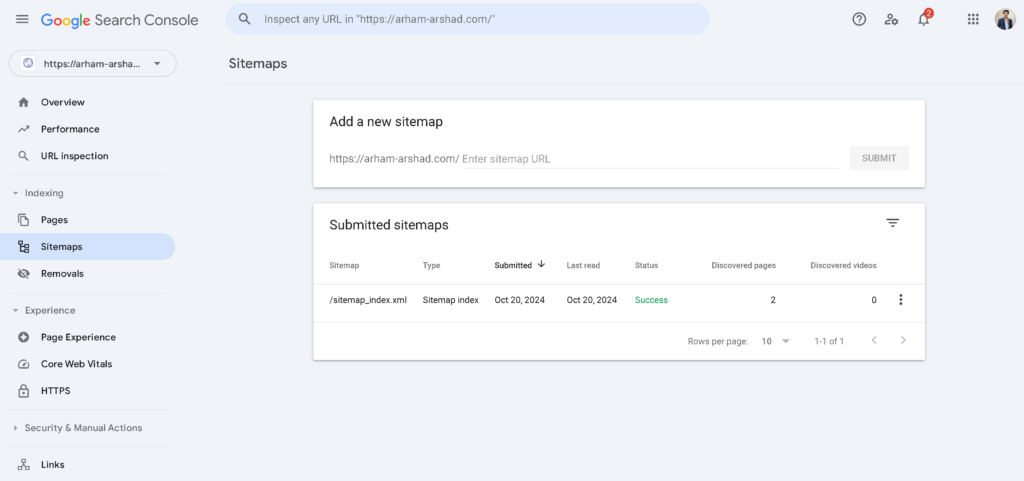
Once you have your XML sitemap made and optimized, the next step is to submit it to the search engines. Submission to search engines is pretty easy with Google Search Console. Simply go to the section labeled “Sitemaps”, provide the URL of your sitemap, and click “submit.” Google will crawl the URLs on your sitemap list starting from this point.
In the case of Bing, you can submit your sitemap through Bing Webmaster Tools. These submissions are one sure way to let the search engines know that your content is ready for crawling and indexing.
Another way to ensure that search engines will find your sitemap is by adding it into your robots.txt file. This file lets the search engine know where your sitemap is, but it also specifies where on your site it shouldn’t or should crawl. There are, as well as automatic ping services to automatically let the search engine know in case your sitemap was updated.
Monitor the status of your sitemap through Google Search Console and Bing Webmaster Tools after you have submitted. Both suites will enable you to monitor the performance of your sitemap and alert you to any issues that may appear during the crawling process.
Maintenance and Troubleshooting
Once you have a sitemap up and running, you will have to keep it current. Websites change, new pages are added, and old ones are subtracted. The reason this is regular updating of your sitemap ensures the search engines always have the most current version of your site to crawl. Most CMS plugins handle this automatically, but if you manage your sitemap manually, make it a habit to update often.
Sitemaps are far from being perfect and can contain any error from basic: incorrect URLs or simply duplicate entries to broken links. In case such errors arise, it should be fixed as soon as possible. Errors might be found by the validators from Google Search Console or popular sitemap validators. Another problem that absolutely is within the bounds of possibility is partial indexing cover. That means some URLs are not indexed, though they are inside the sitemap. For this, you will have to revisit your sitemap for any issues regarding the URLs and ensure that pages you want indexed are crawlable.
Keep your sitemap organized. Watch out for errors. Keep it fresh. This way, you can assure yourself of an effective crawling and indexing process.
Conclusion
There is no need to make the creation and submission of XML sitemaps more complicated than they should be. This will go a long way in improving the crawlability of your website by ensuring that search engines index the great contents of your website with much ease. You are setting yourself up for good visibility on the search results by following these steps. An XML sitemap acts like a roadmap to search engines, directing them through the most important pages of your site. You’ll find it a lot easier to spot any impending problems earlier, and keep your site optimized for search performance all along, if you can update the sitemap regularly and monitor it in tools such as Google Search Console. Now is a great time to start using your sitemap, one that in due course will keep on improving your site’s presence in search results!


